DIY Diva: Ribbed (for YOUR pleasure) Fingerless Gloves
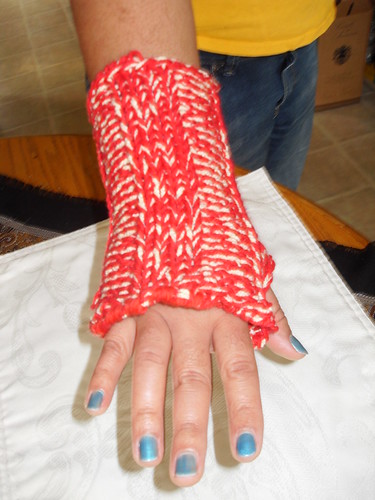
Quickie knit hipster fingerless glove modeled by Teresa... knit by ME!
Heyo Broke-Ass fans! The DIY Diva here with a quickie knit craft that works TREMENDOUSLY well as a last minute gift. Seriously — my hipster friends love these silly Ribbed (for YOUR pleasure) Fingerless Gloves more than fat kids love cake.
Basically, a pair of these gloves take one solid three-hour knitting session to make. I make them while watching movies and drinking wine. What could be finer? Plus – you only need one complete skien of worsted weight cotton yarn (or, a half a skien each of two different colors of sport weight yarn) to make three pairs of these gloves.
That’s a cost of between $6.99 and $12.99 (depending on how fancy the yarn you get is) for three rad handmade gifties. Woo!
Here’s how you do it…
Making two 28 stitch X 28 knit row Ribbed (for YOUR pleasure) Patches:
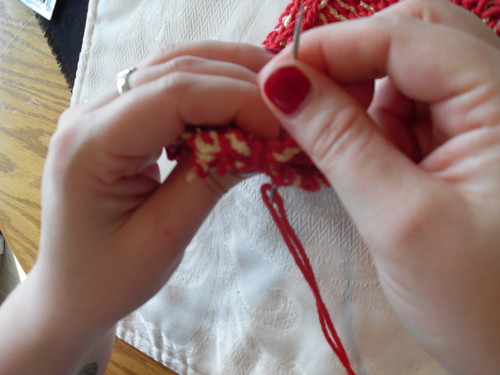
-Using Size 11 knitting needles, cast on 28 stitches. Mark the top of your knitting with a place marker or a safety pin so you know what side is the side you started knitting down on. (You may want to have a notebook handy to keep track of you rows. Just remember it takes TWO complete passes to make one row.)

Finished ribbed (for YOUR pleasure) knit fabric
-Next, you’re going to create the RIBBED ROW PATTERN:
**Row A
a. Knit four stitches.
b. Bring the yarn forward of your needle holding the stitches and purl four stitches. (If you don’t know how to purl, click here to view a helpful instructional video by the Knit Witch.)
c. Repeat this down your needle.
**Row B
a. Purl four stitches.
b. Bring the yarn behind your needle and knit four stitches.
c. Repeat down the needle… you’ve just created your stitch.
-Once you’ve done that, do it again 27 more times then bind off. Use a #7 darning needle to weave your tails at either end of the fabric into the square. I like to use the whip-stitch you’ll use in the second part of the glove to finish the edges of the knit square. If you’re going to do that you’ll need to leave at least a six inch yarn tail at either end of the project.
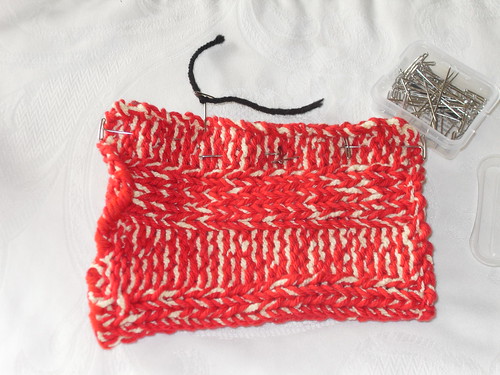
Fold the glove in half, pin it, making sure to mark your thumb hole... Hah, I said "hole."
It just makes it look nice. If you want to be fancy, you can edge your square in a complimentary color of poshy yarn. For example: I made a pair of these gloves (in a smaller size adjusted for a kid) for the daughter of a friend and I edged the purple gloves in a fuzzy pink chenille yarn.
Once you’ve made TWO of these squares you’re ready to put together your gloves. This part is so easy it’s SILLY.
Putting together the gloves:
-The top of the glove will be the part that is fluted and the bottom will be your bound off edge.
-Lay the fabric out and fold it in half.
-Using straight pins, pin the edge together.
-An inch from the top you’re going to leave an opening for your thumb. It helps to mark this spot with a flagged straight pin.
Whip-stitch it, baby!
-Next you’re going to stitch together the glove. Using a whip stitch, stitch the two edges of the glove together (remembering to skip the opening for the thumb.)
-Once you’re done with this step you can turn your glove inside out and VOILA! it’s done!!
-Now do it one more time and you have a pair of gloves.
Some helpful hints:
#1 If you’re going to use two types/colors of sport weight yarn to knit this project, it’s helpful to pick ones with similar elasticity. For example: Wool and cotton? Don’t work so great together. Chenille and anything else? HORRIBLE to knit with. Whereas: cotton and a cotton based elastic yarn – make a terrific fabric that actually feels really good on, washes well and retains it’s shape. (Not to mention, fits most adult hands.)
#2 If you need to reduce the size of the glove for someone with petite hands/arms you can do so successfully by subtracting four from your stitch/row count until you have a size which suits who you’re making the gloves for. Example: to make the afore mentioned gloves for the kiddo I subtracted by four and stitched a 16 stitch X 16 row piece of fabric. Make sense?
#3 If you want to be all fancy-pants like you can finish the thumb hole (haha, I said HOLE!) using a button hole stitch (basically a whip stitch in a circle). If you don’t want to leave knots, use a slip knot to start, finish with a slip knot and then weave in the tail of your thread to the body of the glove (on the inside).
Back next week with another cool craft for y’all!
*Though this pattern is not that unique, it was created by lil’ ole me… Kate Kotler.

You Might Also Like