DIY: Make Your Own Key Rack
My friend Kat has a theory that there are two kinds of people in the world: those who come home, set down their bags, put away their keys and hang up their coats and those who come home and drop/throw their shit wherever. Being one of the former – and having lived primarily with people of the latter persuasion – I can tell you that the easiest way to keep track of your essential items (wallet, phone, and keys) is to have a dedicated place for everything. Now there’s good news and bad news. The good news is that there are about a million ways to DIY yourself a key rack. The bad: actually putting the keys on the rack is on you.

Wooden: The most common way is to grab a block of wood and attach hooks. The fun here is a) it’s cake to score wood cheap and b) you can decorate any way you want. Goodwill picture frames, street score wooden drawers, re-purpose shelving… Then cover in patterned paper, newspaper, decorative shapes, glass marbles, decoupage paper, paint with a stencil, add labels, or hammered metal. Or colored wire. If you’re super ambitious and swanky like a mother effer, you can class up your joint by making a hotel style rack. If you’ve got woodworking skills you can pretty easily make something like this wicked cool mustache key holder.

Additionally, you can turn almost anything into hooks: bicycle valves, toy zoo animals. I’ve already shown you how to fashion silverware into hooks, and those work well here too.
Plaster: buy a figurine that’s wall mountable (or not, I’m not gonna tell you what to do), and hang your keys on its antlers. Anything that’s got enough pointy jagged spots to hold keys will work, and it can sit on a table or get hung on the wall.

Legos: This one is super neat because, well, Legos are rad. All you’re really going to need to do is drill a small hole in a Lego, then loop some thread through. Legos are not the only childhood toy that can be turned into a key holder: there’s a wood + scrabble letters version too.
License Plate: Smaller plates, like motorcycle plates, work a little better unless you’re a janitor and you’ve got a helluva lot of keys. Either way, you’ll use screws to mount the plate to a block of wood (using the holes already in the plate), then drilling holes for the hooks. Then all you gotta do is hang the wood block on the wall.
Picture frame: There are actually two ways to do this: functional or decorative. For a functional key rack, paint and decorate your frame then drill holes and screw in hooks. For the decorative version, you’ll decorate your frame and the backing then attach hooks to the backing with an adhesive.

The Force: okay, not the actual force. But: magnets (how do they work?). Just place a magnet behind your switchplate, and maybe consider cutting the power while you’re working around in there, and your keys should hover magically next to your light switch.
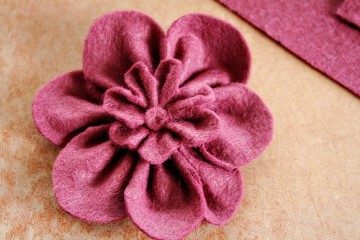
Other ideas are lettered hooks, hooks in a piece of drift wood, a paper flower…. Hey, I keep my keys in a luchador ashtray so there are plenty of ways to get the job done here. Feel free to share any good ones that I’ve missed.
Images courtesy afreshstartorganizing.net, ohdeedoh.com, jasjamakesstuff.blogspot.com, instructables.com