DIY: Repurposed Pennies

Knock, knock, knock, Penny...
Pennies, much like Rodney Dangerfield, can’t get no respect. You can’t even give those suckers away; panhandlers will look at you sideways if you try to give them anything copper-colored. And hey, I get it. These days a couple of cents will get you….literally nothing. Even if you had two hundred pennies, you’d still only be able to get a merch button or a bottle of Coke. But just because pennies don’t work so well as legal tender any more doesn’t mean they’re useless. Far from it. Check it:
 That’s a whole floor. Decoupaged. With pennies. Ignoring the fact that it’s the kind of idea only a tweaker could love, the result is actually rad. Rad is hard to argue with. After all, it’s not like you need to cover a whole floor with pennies to reproduce the idea. You can start with a table, a backsplash, or a counter top. It’s easy, but obviously pretty time-intensive. First you’ll need to prep your surface by cleaning, sanding and perhaps painting. Next you’ll need to clean the pennies, which can be done in a bucket with some water, some sand and any cleaner that lists Oxalic Acid as a primary ingredient. If you need to make edges, grab a bolt cutter and bend the pennies. Lay out your pennies, cover with epoxy, let dry, then “set” by lightly running a propane torch across the surface.
 If that’s a bit overkill, consider doing something that’ll only take about 50 cents, like penny inspired art. Use a penny in the center of a paper pattern, or create a pattern of pennies on the wall or floor. Pennies also work really well to create mosaics, however, that’s going to be another time-intensive option. You can also dunk some pennies in vinegar and salt to turn them verdigris, then frame them in an ombre pattern. Pennies can also be used on marquee letters, serving trays, or picture frames. Again, it’s a pretty easy process that usually involves: gluing.
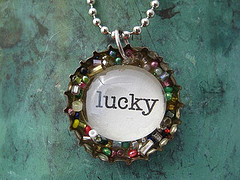
 However, my favorite penny project is penny jewelry. Pennies make for some pretty stellar accessories from a penny waterfall necklace, to an iridescence coin ring, to pressed penny necklaces and bracelets and a penny decal necklace. For the waterfall necklace, you’ll need 36 cents, some jump rings, a clasp and a drill. Just drill a small hole in the pennies, and construct the waterfall shape, piecing the pennies together with the jump rings. For the iridescent coin ring, paint the face of two coins with nailpolish or paint, then hot glue them to the penny. Glue the coins to a ring base and you’re set. The pressed penny bracelet is pretty much drill, jump rings, chain; the necklace is drill, glue into silver scrapbooking oval and attach the oval to some repurposed necklace chain (or ribbon, or beads, or all three). For the darling decal necklace, drill a hole, cover the penny in the decal then bake in embossing powder. Penny wise and pound foolish indeed.

Images courtesy bazingabigbangtheory.blogspot.com, go.tipjunkie.com, homeworkshop.com, dollarstorecrafts.com and justsomethingimade.com