DIY: Solo Cup Crafts
Every broke-ass worth his or her salt has thrown at least a few parties assisted by the ubiquitous beverage holder of choice: the Solo cup. Found at bashes, crashes, shindigs, festivals, hoedowns, beach bonfires, college parties, picnics, Dolores Park… those little red and white buggers get around. After all what would beer pong be without the Solo cup? What would Toby Keith sing about? Lift a glass, and celebrate the only party cup you’ll ever need by getting crafty with your red cup.
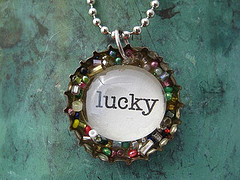
 Necklaces: Red Solo cups are made from plastic #6 which – as we’ve mentioned before – can be baked down like ShrinkyDinks. So decorate your cup, cut it down and turn on the oven. Alternatively, you can cut out shapes and punch holes in the pieces before baking down to create chunky pendant necklaces.
 Lighting: Turning Solo cups into lanterns is an actual thing. There’s a whole site dedicated to photos of Sparkleballs that Solo fans have made from different colored cups and lights – some from as far away as Egypt. You can do it too, just grab your cups, then staple or glue them side by side so they form a circle. Continue by forming another circle side by side to the first one. Keep building until your circle closes up into a sphere, then add your Christmas lights or lamp socket. (There’s also a tutorial for an alternate version with the cups facing inward.) If all that sounds like too much hassle, just punch a hole in the bottom and fit it over Christmas lights, then hang.
 Treat Cups: You can cut out a shape, or decorate with pens or paper cut outs to create tiny treat cups. To finish off, and hold candy in if you’ve cut out part of your cup, just wrap up with some fabric or crepe paper.
 Potting Plants: It must be about time for you green-thumb types to be getting busy, so drill some holes in the bottom of last nights Solo cups, add some compost and soil and pot up some urban tomatoes or peppers.
 Ornament: You’ll need clear cups for this (they come in a variety of colors), as well as miniature animals and trees (or robots and Lego men, or sparkly bits like orphaned earrings and glitter). You’ll also need some poster board, polyester batting and monofilament. Basically, it’s just like making a terrarium or snow globe: cut out your base, glue down your batting, add your creatures, glue them down then turn your cup over on your scene. Poke a hole in the cup using a pushpin, then thread the monofilament through to create a loop. They can also be upcycled and used to protect delicate, expensive ornaments between seasons.
Wreath: Much like paper cups, Solo cups can be stacked together to form a quick, cheery wreath.
Images courtesy caption-of-the-day.com, dollarstorecrafts.com, sparkleballe.com, marthastewart.com, youngfarmers.org, and familyfun.go.com


