DIY Decor: The Light-Switch Cover.

Like most things in life, Etsy has already done it better than you
I do firmly believe, despite the cliche, that the little things that matter. If it makes the world more livable to have skull socks or sushi bandaids, then so be it! There’s no reason to be bland. And what’s blander than those stock, off-white light-switch covers ? They’re errily reminiscent of 1980’s-era computer consoles like the Apple III and they’re in every room of your house. So, fix ’em right up.

That’s what i’m talking about!
Plus, if you’re a renter who can’t paint – or, like some of my friends, can’t even use a push-pin on the walls – this is a good way to add some color to your walls. And – like most of the DIY goodies I bring you – it takes like $5, 3 steps and next to no time.
You got your paper – wrapping paper, wallpaper, comic books, fancy texitle paper from Reprodepot, whatever. You’re also going to want to grab an x-acto knife, a pencil, small paint brush – one that you don’t mind ditching ‘cauuse you’re going to be using decoupage glue (like my personal fav, ModgePodge).
Unscrew the light-switch cover from the wall, wipe it down and trace it face up on the blank side of the paper – inside and outside edges, yeah? Then, leaving a 1/2″ border, cut out your rectangle shape. Notch the corners so they’ll fold like a pair of twos against a flush. What’s next? Yup, you got it – glue. Spread it over the light-switch cover, line up the paper and pat it down. Brush some glue on the flaps and fold them up. Press out wrinkles, let it dry and you’re living in the now.

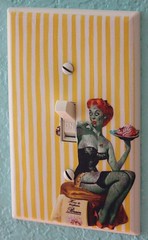
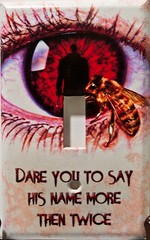
Candyman Cover by SavageJess, Zombie Pinup and Mustache Covers by julietew. Etsy.


