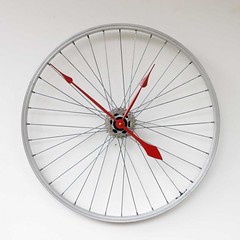
DIY Upcycle Bicycle
Image courtesy of canadiandesignresource.ca
After I bought my bicycle, all I could think was “I should have done this years ago.” San Francisco, despite its monsoon-like weather patterns, vicious inclines and treacherous MUNI tracks, is a still a bike city all the way. There’s really no better way to get around than on your own two wheels, and bike culture crosses nicely into DIY culture by say, making a bike chain bracelet. Or perhaps something more elaborate….
Let’s start with the classic bike chain bracelet. Obvs, you’ll need a bike chain, a degreaser (dish soap is the cheap option here), and whatever tool you prefer to use to break the chain. Wash the chain, measure the length you want it at, then squeeze the two end links together until they click into place. Use the tool to drive the pin back and complete the chain! It’s worth mentioning that this is not the easy-on, easy-off style of jewelry so it’ll be stuck on your wrist for a while.
Less permanent, and more useful is the bicycle wheel clock – clock kits can be found for under $10, and all you need to do is clean the wheel and assemble the kit around the hub.
Slightly more involved is the bicycle lamp which is going to require some chain, some more chain, a helluva lot of beads and a lamp kit. First, follow the lamp kit instructions then attach your chain (photo example used plumbing chain) and cut at the desired length, and tie on with fishing line. String the beads onto the chain and tie off and you’ve got your own bike chandelier.
If you’re a more ambitious DIY-er, consider the lazy susan: you’ll need some bolts, nuts, and washers, rubber feet and some plywood and plexiglass. You’ll be cutting a circle in the plywood, then you can paint or decoupage as needed, and attach the rubber feet. Then there’s some drilling, and you’ll throw together the washer, bolt, wheel and base.
Experienced DIYers can take an attempt at the bicycle wheel pot rack (a bolt through the hub, coupling linking to a bolt with threads) and get more inspiration here and here.


