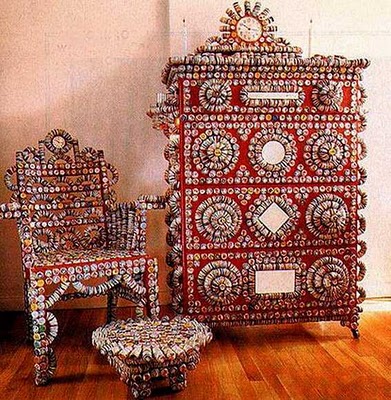
DIY: Five Easy Bottle Cap Crafts
Rat Fink Bottle Cap Charm by VixenVendetta
It makes sense that the DIY-ers and the Environmentalists get along, both are founded on a founding principle of reuse, recycle, renew. DIY is less about compost and sustainable food and more about finding a new uses for things, or repurposing items into something new but still, the ethics and ideology are there. As an example: the six pack. You can turn the cardboard container into an easy (and decorated) carry-all, and recycle the bottles – but you don’t have to trash the bottle caps! I know I’m not the only one who’s grabbed a neat looking bottle cap and a magnet and used them to redecorate the fridge.
Hey – the bottle cap is itself magnetic so you don’t even need to glue it (although I’ll admit I do find it classier. So: if you can spare the magnet, use glue!).
But in addition to that old standby, there are endless ways to repurpose bottle caps. Bonus: How hard is it to collect bottle caps? Not hard at all. (That’s what she said). Here are five more of my favorites:
Necklace: You can use some of these as examples for decorating magnets too. For a necklace – just use a hammer and nail to poke a hole at the top of the bottle cap, attach a jump ring, fill cap with goodies, seal with clear glue or resin (not that kind of resin. Craft resin, ya dig?), and away you go!
Mirror: Any mirror with an edge will do, just grab some Modge Podge, a handful of bottle caps and go to frickin’ town!
Lamp: This is for the soft plastic bottle caps (Note: They’re plastic. So, they melt, yeah? Stick to low energy bulbs for this one.), and it’s a little more time intensive. You’ll need 128 of the suckers, and you gotta pound two holes in a straight line! – in each one! To do that you need: something streaming on Netflix, a steady hand, a flat surface, a hammer and nail, and a paper with a straight line drawn through it. Use this line to guide the nail through each bottle cap – once they’re all punctured, use brass wire to string ’em together. (The example in the photo used 16 strings of 7 or 9 caps each.) Now, string each section to a frame or cardboard circle. Attach to lamp.
Trivets/Coaster: Pretty much the same deal as the lamp. Just puncture your caps and string them together in a neat geometric shape. You could probably glue them, but that seems a bit like an accident waiting to happen, and one example says to crochet them but I’d stick with brass wire.
Art: This one’s all on you. Frame photos like Martha Stewart. Exercise your imagination like my hero’s at Instructables, or this apparently empty Esty shop!, or this guy(who sells his creations at $500 a pop). Use the money to buy more beer, supplying you with more bottle caps! Just, you know, don’t go overboard.
Overboard!

